Series Parts:
- Part 1: Overview of Content and Config Entities in Drupal 8
- Part 2: Most Simple Entity with Bundles
- Part 3: Simple Content Entity with Bundles
- Part 4: Practical Content Entity with Bundles
Note: In this example the Content Entity has been renamed to “Simple” and the Config Entity has been renamed to “Simple Type”. This is because each example is actually its own module in the Github repo.
The Plan
- Provide navigation for entity management.
- Provide useful messages when managing entities.
- Provide useful collections (lists) of entities.
The Code
Let’s creating some simple YAML files that will map the routes provided by the route_provider annotation to links within the Drupal UI.
Menu Links
This first of these is MODULENAME.links.menu.yml. This file adds links to Drupal’s core administrative menu system.
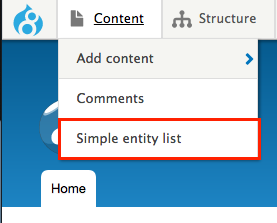
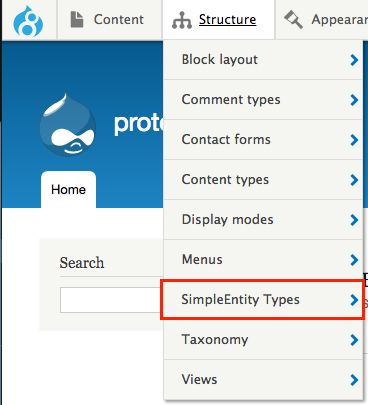
Looks simple enough, but there is a mystery here. Where do all these route_names come from? The answer is in the Content Entity’s handlers[route_provider][html] annotation. Let’s look at how that works.
Route Provider & Links Annotations
The route_provider = {} works in conjunction with the links = {} annotations to dynamically create routes for your entities. For each of your links = {}, the route_provider creates a route named in this pattern:
entity.{{ your_entity_id }}.{{ machine_safe_link_key }}.
For example, consider the following abbreviated example and compare the links and their resulting route names:
/**
 * @ContentEntityType(
 *   id = "simple",
 *   handlers = {
 *     "route_provider" = {
 *       "html" = "Drupal\Core\Entity\Routing\AdminHtmlRouteProvider",
 *     },
 *   },
 *   links = {
 *     "canonical" = "/simple/{simple}",
 *     "add-page" = "/simple/add",
 *     "add-form" = "/simple/add/{simple_type}",
 *     "edit-form" = "/simple/{simple}/edit",
 *     "delete-form" = "/simple/{simple}/delete",
 *     "collection" = "/admin/content/simples",
 *   }
 * )
 */
| Link Key | Route Name | Route URI |
|---|---|---|
canonical |
entity.simple.canonical |
/simple/{simple} |
add-page |
entity.simple.add_page |
/simple/add |
add-form |
entity.simple.add_form |
/simple/add/{simple_type} |
edit-form |
entity.simple.edit_form |
/simple/{simple}/edit |
delete-form |
entity.simple.delete_form |
/simple/{simple}/delete |
collection |
entity.simple.collection |
/admin/content/simples |
The alternative to using a route_provider for your entity is that you would have to manually define all the routes yourself within a MODULENAME.routing.yml file. So as you can see, route providers are really helpful!
Moving on…
Tab Links on Entity (Tasks)
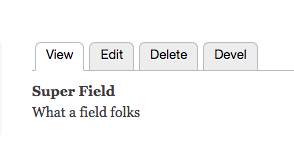
Task links give us the familiar View/Edit/Delete tabs at the top of an entity, just like you see on Nodes.
After understanding the route_provider, this should look familiar. route_names are created by the route_provider, and base_routes are the route name these tasks should be attached to.
“Add New” Entity Links (Actions)
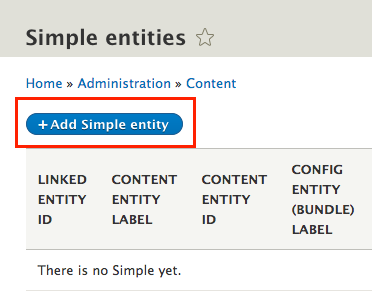
Action links provide the helpful “Add New” buttons at the top of a list of entities. By now this should look pretty straight forward to you.
Content Entity
The Content Entity has not changed much since the previous example, but there are some important differences. See if you can spot them.
That’s right, we have changed some of the handlers to use new custom classes that we will create. Specifically the list_builder and the default/add/edit forms. Good catch! Let’s see what those new classes look like.
Content Entity Form
The Content Entity’s new Form will look a lot like the previous Config Entity Form. All we need to do is extend the ContentEntityForm and override the save() method.
In the override for the save method, we provide some simple messages to inform the user what has just occurred, and a redirect that takes them back to viewing the entity they just created or updated. Easy peasy.
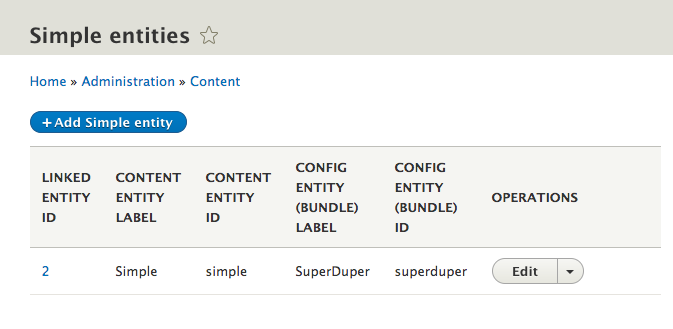
Content Entity List Builder
List Builders are used when displaying an Entity’s collection route. They should provide useful information about each entity, as well as common operations that can be performed on the entity.
To create a new List Builder, extend the EntityListBuilder class and override the buildHeader() and buildRow() methods. Return a keyed array of the header labels or row data respectively.
The new List Builder for our Content Entity will show all the information we currently have about the entities, which at this point isn’t very much.
Config Entity
Like the Content Entity, the Config Entity (which manages our Bundles) has not changed very much from the previous examples. The only change is a new custom class for handlers[list_builder].
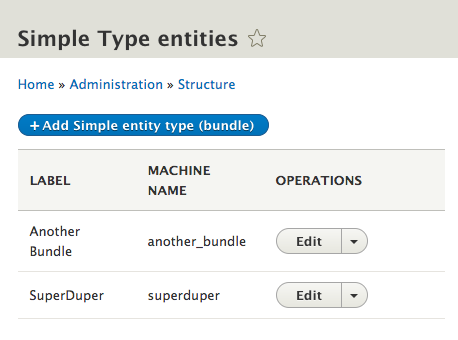
Config Entity List Builder
The List Builder for our Config Entity is even more simple than that of our Content Entity. The same principles apply to creating it, but in the case of the Config Entity we have very little data to show per row.
Config Entity Form
Since the purpose of this new version is to provide a better admin experience, I’ve modified the Config Entity Form to have an additional “Save and manage fields” button that when clicked will redirect the user to the “Manage Fields” tab for the entity.
The actions() method is overriding that of the parent class and adding a new “Save and manage fields” button. That button has a #submit handler on it that will call this class’s custom redirectToFieldUi() method.
Results
That’s it! Improving our most_simple entity by creating a better admin experience was mostly about providing navigation, useful messages, and entity information on the collections route. Our resulting simple entity is not too shabby.
? Problems: Not many! Sure, there is plenty of room for improving this example and making it much more practical, but as far as it goes we have addressed the major issues one might have when working with these entities. Huzzah!
Next – Part 4: Practical Content Entity with Bundles
Discussion
I appreciate your time you’ve spent to write this super nice article. I’ve opened so many things to myself, which I couldn’t find anywhere else. This is a high quality content. Thank you!